Adding the Summary Band
A Summary Band which will now be created will contain the employee count and sum of salaries for all departments. Recall that the Summary Band always prints on the last page, immediately before the Page Footer Band.
To create the summary band:
- Click on the “Create a new band” icon
 on the Band Report Editor toolbar, then click anywhere within the report image.
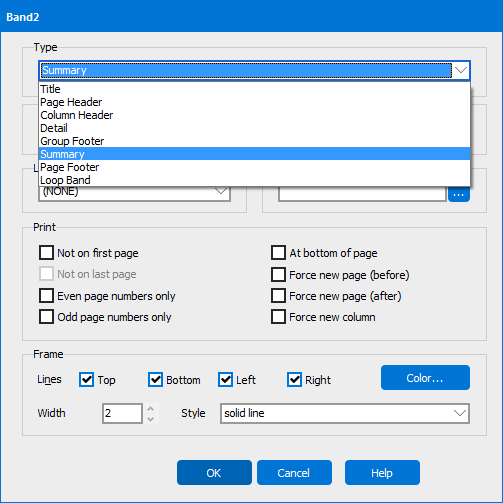
 - In the dialog box that appears For the Type, select “Summary”.
- A frame will be placed around the band. Check the Top, Bottom, Left, and Right check boxes. Set the line width to 2.

- Click OK to return to the report designer. Notice the new Summary Band at the bottom of the report with the solid line surrounding the band.

- Add the employee count and sum of salaries to the Summary Band by copying the expressions from the Group Header Band and pasting them into the Summary Band.
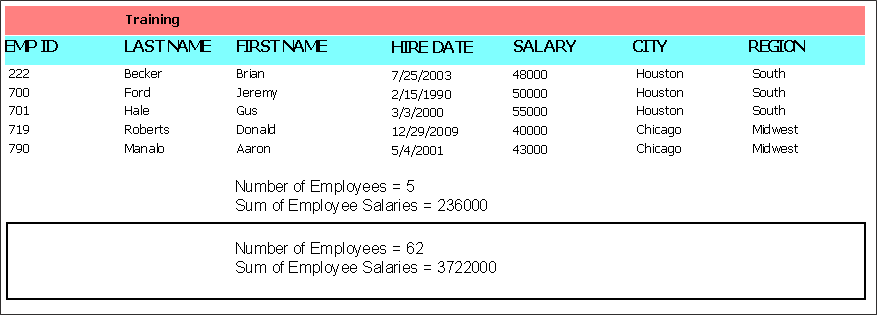
The final page of the report will now appear as follows:

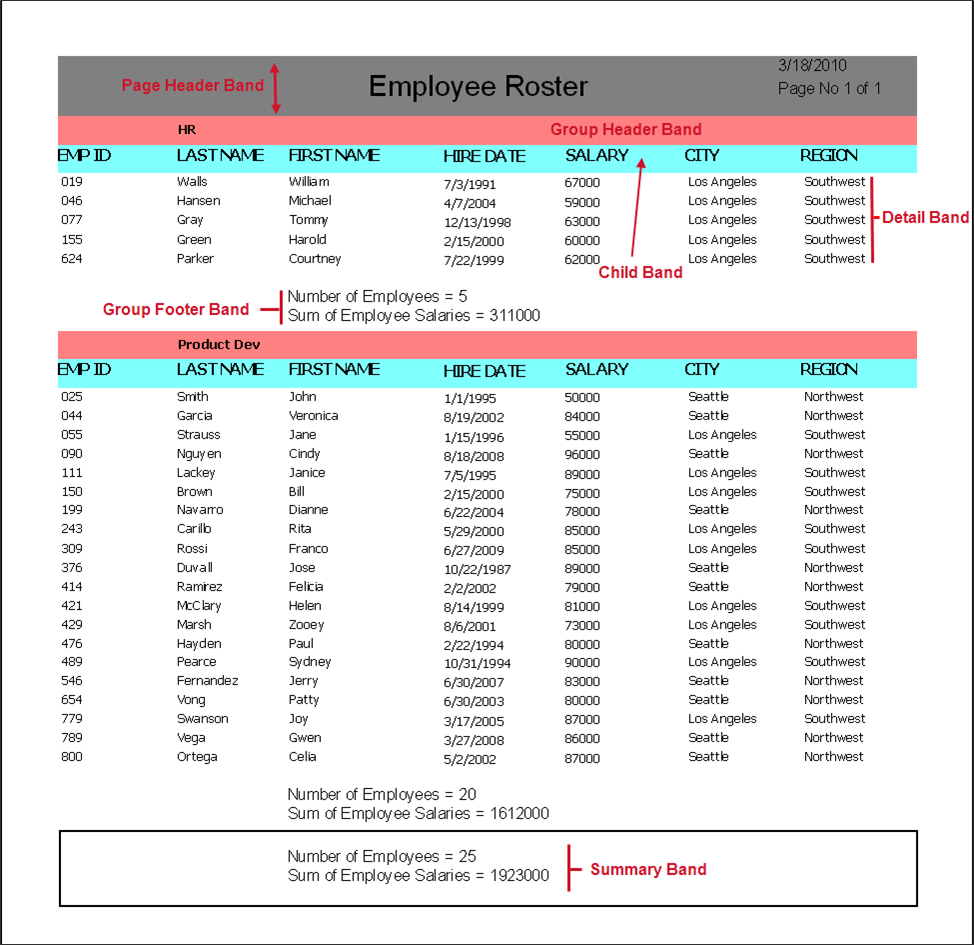
Note the total employee count and sum of salaries as well as the frame around the Summary Band. The final report now appears as shown below:

The report above consists of only one page because in the parameter query for this particular figure, only the HR and Product Development Departments were selected. There are seven departments within the sample database that could have been chosen for this report.